This lab main objective of this lab is to launch a projectile into the air while passing certain criteria given by the lab. The purpose of the lab is to discover and understand how to use and counteract physical properties to make a projectile fly high and straight, and how to use physical principles to make an egg land safely against the force of gravity. Moreover, the purpose of the lab is to use mathematical formulas associated with the concepts and laws of physics to not only check our results but see if and where human error or other confounding variables affected the rocket. Another purpose of the lab is to deepen our communication, team work skills, and expose us to real world scenarios of the physical world. We also work on our construction skills due to the fact all parts besides the projectile itself must be made, not bought, and we work on our professional skills and work ethic by being exposed to deadlines.
Conclusion
Of our three rocket flights, our first was the most successful. We reached a height of 67 feet with the rocket separation, successful parachute opening, and a safe egg landing. The only downside of our launch was not hitting the 75 feet mark, though 67 feet is still respectable. Our second was moderately successful with everything working as planned, except the rocket went even lower (59 feet). Our third launch was our least successful, while we did launch 123 feet, the rocket did not separate, no parachute deployment, and an unsafe egg landing. The biggest thing to change for next time is to figure out a standardized combination on how much parachute to leave out and how tight to put the top half on the bottom. This is the part of the rocket that was completely variable each test. A standardized “happy-medium” of how tight to put the top half on and parachute hanging out would allow us to successfully reach the 75 feet mark with separation, parachute deployment, and a safe landing. Overall, we greatly enjoyed this project as it allowed us to put to test in the field in an experimental environment, what we were learning in the classroom. We were able to have creative freedom with much of the rocket design, allowing our group to work together to assemble a product of which we were all extremely proud.
Parts
Rocket Creation – Whole Team
Goals – Jake
Materials and Procedure – Jake
Results – Jake
Pictures – Oriel
Calculations – Buddy and Oriel
Conclusion – Buddy
Blog – Buddy
Pictures and Videos

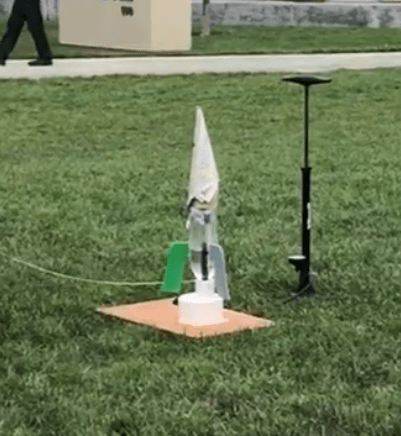
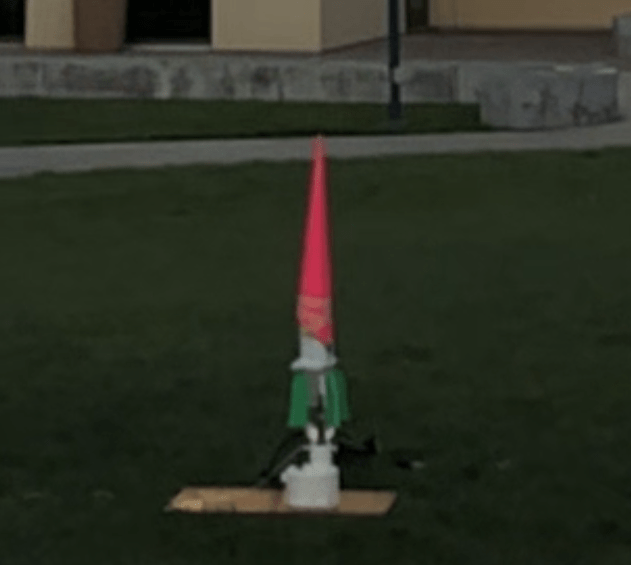
Final Design
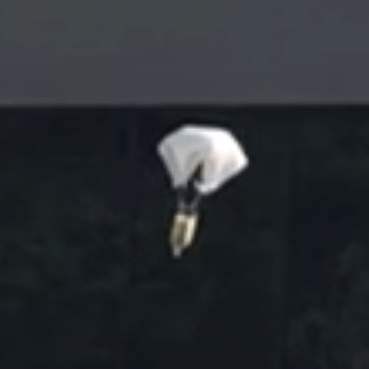
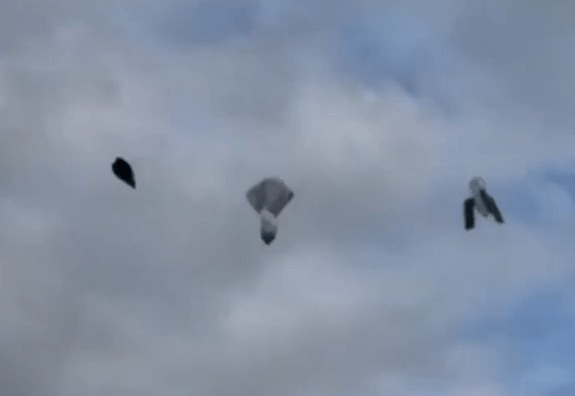
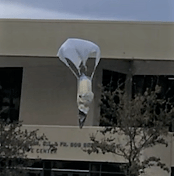
Final Design with Large Parachute Opening
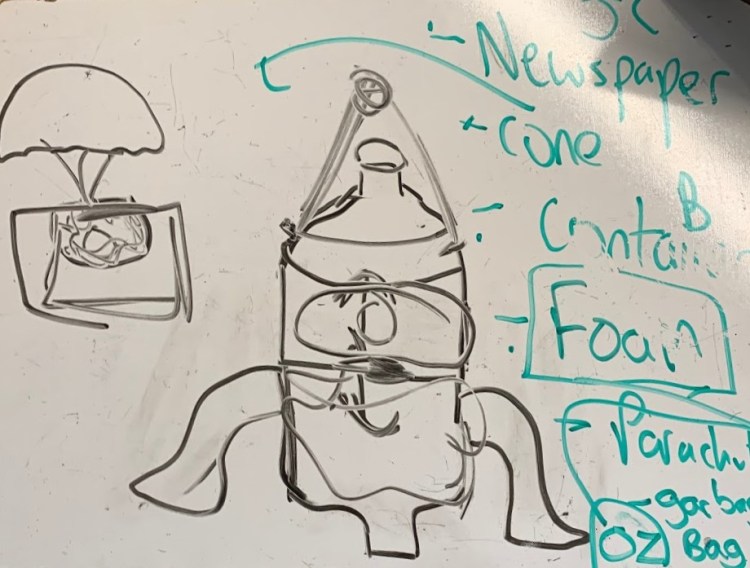
Original Brainstorm
Original Design with Non-attached Nose Cone and 3D Printed Fins
Separation with Small Parachute and Non-attached Nose Cone and Original Body
Attached Nose Cone and First Small Parachute
New Attached Nose Cone with Updated Body and Laser Cut Fins
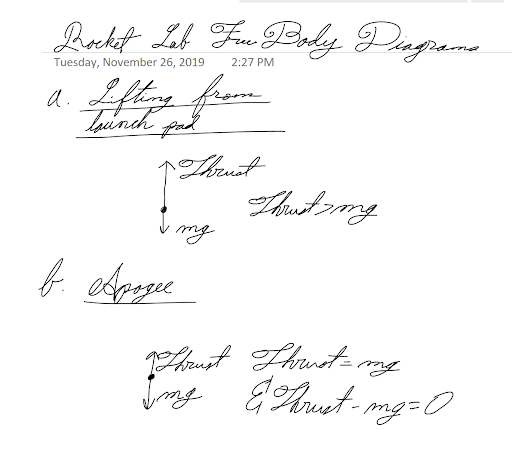
Calculations


Results
In this part we are going to talk about the changes we made throughout the process to our final launch. Preliminary, we said we were going to have the egg separate in its own compartment and have the parachute only attached to that part, rather than have the egg in the top half of the bottle. However, we then changed it so that the egg would go into the second half of the bottle. At first, we wrapped the egg around packaging foam, put that in a small container, then wrapped the container around “egg carton” foam, and then put all of that in a big sandwich bag to keep it snug. We then put even more packaging foam to fill the gap between the bag and the tip of the bottle. After doing many test runs we realized we were getting the separation and deployment, but that we were not getting a desired height. We realized that the egg was indeed very protected, but it also had a lot of weight. So, we took out the extra packaging foam, the small container, the sandwich bag, and just used a little bit of packaging foam and the egg carton foam. Also, at first we were using a small bag for our parachute, and we decided it was not giving us the slowing down of speed we wanted. Because of this, we changed to using a garbage bag as our parachute. A problem with this however was that due to the size of the parachute would not deploy if we stuck it all the way in the bottle, so we would leave a little hanging out to make it deploy. When we tested this out, it worked very nicely. Another change we made was that at first we used 3D printed wings, but they were very large and heavy, and greatly decreased the height the rocket could potentially reach. Because of this, we switched to laser cut foam wings which greatly decreased the weight of the rocket and even fulfilled the purpose of wings better. The last change we made to the rocket itself was the use of a nose cone. We tested out a nose cone twice, and both times the rocket would veer off diagonally because we could not get the nose cone straight. After doing test runs without a nose cone, we decided that the bottle could go high enough without the nose cone and that the nose cone was just even more unnecessary weight. One other change we made was the amount of water we used. We explored the usage of ½ half of water to ¼ of water. What we found was that with ½ the rocket did not get high enough, but with 1/4 , the rocket flew crazily, not straight. We found that between ⅓ to ⅜ was a good amount of water.
Now, we will talk about the performance of our rocket during the final launch. Looking even at our best launch, we still did not meet all of the highest requirements. We had separation and deployment of the parachute, and our egg was ok, but we only reached a height of 67 feet, instead of the desired 75 feet. With our second launch, once again we had separation and deployment, and the egg was ok, but we only reached a height of 59 feet. We hypothesized that the reason it went so low is because we put the top half of the bottle loosely on the second half of the bottle with the parachute sticking out to make it easier to deploy, and because of this the two halves were separating too early and not reaching their maximum potential height. For our third launch, we decided to put the parachute more in the top half and have less hanging out, and we put the top half on tighter. This led to a height of 123 feet, but we had no separation. Looking at the results of other classmates, only 4 groups met all of the highest requirements of 75 feet with separation, deployment, and the egg being ok. Also, the highest height recorded was 142 feet, but with no separation or deployment. A trend I notice throughout the results was for the groups that did not get all the highest requirements, they had similar issues to ours. They either did not get 75 feet but had separation and deployment with a protected egg, or they got over 75 feet with either no separation, deployment, and/or a broken egg. What was unique about our group is that we had the lightest rocket of 945 grams, or 0.945 kilograms. Hypothetically, you could see this as meaning we could have gotten the highest height because we had the least weight, but it could also mean we didn’t have enough ballast weight causing us to not go high enough. Afterall, the average weight of all the rockets was 1.17 kg, showing how we were very below this weight. The average weight of the successful flights was 1.15 kg, just a little lower than the overall average. Looking at the group with the next lowest weight of 0.9866 kg, they fulfilled all requirements. From this we take that maybe a little more weight would have been useful, but not over 1.1 kg because when we did have that it did not help in the case of our bottle rocket and design. During the tests, there really was no wind, so we would not count that as a factor. One factor that we think could have made a difference is that through construction, tests, and reconstruction, our bottle had a lot of dents in it, which could have made it less aerodynamic and be asymmetrical, causing unusual flights. Same thing happened to our wings, as the foam got a little bent, which could have caused non-straight flights. We do not think there was any error equipment with the launcher. The only issue we think caused the difference between getting the right height or getting separation and deployment was how tight we put on the top half of the bottle onto the bottom half.
Materials and Procedure
Procedure
To begin, we did not immediately go to building. What we first did was go to the drawing board. We drew all the key components of the rocket such as the parachute, wings, and nose cone and talked about how we would protect the egg and make the bottle separate. After agreeing on an initial design, we then started building. We used 2 Pepsi bottles which fit on the launcher nicely. We also put a lot of focus on the safety of the egg. We used packaging foam as a first layer to wrap around the egg, then we wrapped the egg around egg carton foam. We also put cotton balls to fill the gap between the tip of the bottle and the safety mechanism. With all the safety mechanisms packaged in, we put the parachute over that so it would be able to deploy. We used the hole puncher to put holes in the bottle and in the garbage bag we used as our parachute. We used string the attach the parachute. We made the string very short so that it would deploy quickly and be less likely to get tangled. Instead of tying the string, we used a hot glue gun to attach the ends of the string together. We built a nose cone out of newspaper originally and the construction paper, but for our final launch we did not use one (see results section for reason). When we were using the nose cone, we attached it to the bottle with tape. For the wings, we first used 3D printed wings, but they were very large and heavy, so we switched to laser cut foam wings. We attached the wings to the bottle with the hot glue gun. For the two halves of the bottle, the only thing keeping the two halves of the bottle together was friction, and we would place the top half of the bottle very loosely on the bottom half so it would come off easier, and we put the parachute hanging out a little bit so it would deploy. For our final launch, we used a water amount of about ⅓ to ⅜ of the bottle. We all had to use a psi of around 40.
Materials
5 hard boiled eggs
2 2-liter bottles
Newspaper
Garbage bag
“Egg carton” foam
Packaging foam
Cotton balls
PLA ( 3D printed material for initial wings)
Laser cut foam for wings
String
Water
Bottle rocket launcher
Bike pump
Construction paper
Hot glue gun
Scissors
Hole puncher
Exacto knife
Altimeter
Small snack container
Cling/Plastic wrap
Sandwich bag
Tape
